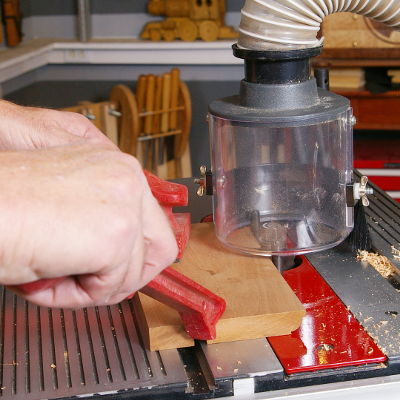
STEP 3: SHAPING A DECORATIVE EDGE
Before Proceeding, CLICK HERE to see a listing of Safety Rules that will help you avoid Personal Injury.
To view a brief (few-seconds long) video clip of each step being
performed click on this icon
 wherever you see it.

Now that we've selected and installed our desired cutter, let's shape an edge. First, we need to adjust the cutter we just installed to the height that will produce the edge profile we want.
IMPORTANT: For the smoothest results, we recommend that you make your first pass through the cutter at no more than 80% of your intended full depth-of-cut, followed by a second finish pass at your intended full depth.
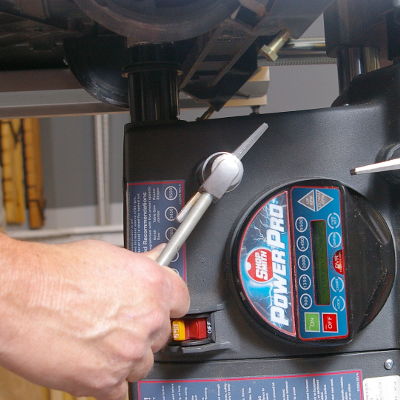
To make this adjustment, loosen the quill feed lock. Then,
rotate the quill feed handle until the cutter is set at your
desired 80% profile.


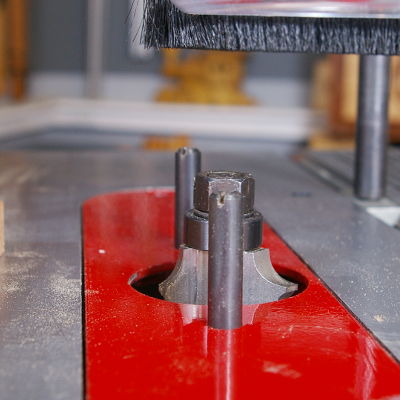
Verify that the guide pin you installed above is securely tightened in the threaded insert hole on the ROUNDED end of the table insert and that your MARK 7 is set to run in FORWARD direction.

Turn on your MARK 7 and set your speed between 9,500 RPM and 10,000 RPM. Rest the leading edge of your workpiece against the guide pin and rub collar while you move it forward very carefully into your 80% initial pass cut. If you're shaping a straight edge and have elected to use BOTH guide pins, as you reach the end of your passes, be prepared to move your cut edge into the outfeed guide pin as you exit the cut.
WARNING: Be sure to use appropriate safety
devices such as push sticks and/or push blocks to guide your
stock safely past the rotating cutter.

See How Easy And Painless This Learning Process Has Been!
With this email, you've now been through the complete 7-email series about learning to use the 7 basic machine functions of the Shopsmith MARK 7. We hope that you've found the series to be both informative and enjoyable. Now, the only thing left to do to build your Shopsmith woodworking machine skills is to pick a project you've been thinking about (or have your significant other pick one FOR you) and get started. Just remember, there no reason to be fearful about woodworking. Think about each project you create as a series of quick, easy-to-build smaller projects that all join together once they're completed.
For generations, woodworking has remained one of America's favorite pastimes. Now that you have the best tool to work with, we're all hoping that it will quickly become one of yours, as well.
WANT MORE INFORMATION ON SHAPING? CLICK HERE!
© SHOPSMITH - DREAM IT! BUILD IT! SHARE IT!


