|
|||
Articles and Projects
| Back to Article and Project Index | |
|
A Traditional Drop Leaf Table Details, Drawings & Layouts mentioned in this article can be found Here
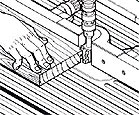
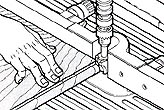
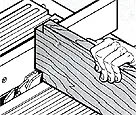
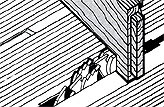
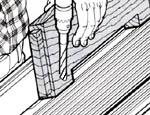
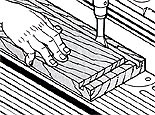
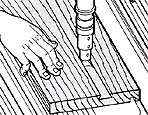
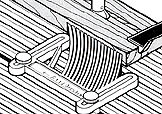
Several years ago, Hands On featured a Drop Leaf table, and the response was only lukewarm. Oddly, the feedback we received didnít mention the number and variety of joints required (as we expected), rather, it was about the extreme difficulty of turning all four legs to match. Our research shows that for years, do-it-yourselfers and leisure-time woodworkers have not attempted projects that involve making duplicate turnings on the lathe. After all, lathe turning - especially making pieces such as the legs in this project - demands a great deal of time to develop the required skills. But now, the Lathe Duplicator has changed the rules. Now the tedious hours of marking, measuring, and practicing are over. With this duplicator, you simply make your pattern, mount it above the raw stock, and every piece you turn becomes an exact duplicate. Itís virtually impossible to make a mistake. Of course, you donít have to use a lathe duplicator to complete the Drop Leaf table project, but itís safer, easier, and far more precise than free-hand turning - and all your table legs will match perfectly. This small Drop Leaf table is patterned after a traditional Pembroke Table. Mortise-and-tenon joinery is used in this project to make a table thatís long-lasting and quite durable. Drop Leaf or rule joints are used to enhance the tableís lines and eliminate the otherwise visible gap between leaves and tabletop. 1. Cut all the stock to size according to the List of Materials. 2. Since you will likely use several pieces of stock glued together for the tabletop (M), we suggest cutting the edges of that stock with a very sharp Glue Joint Shaper Cutter (Fig. 1). This gives you a self-aligning, unitized spline/groove combination, increases the gluing surface, and provides a stronger bond. The rough top to be squared later should measure 36" x 19", thus providing ample stock to cut the Drop Leaf joint. Hint: keeping the worktable at waist level makes controlling the workpiece easier. Fig. 1 Cutting glue edge. 3. To cut in the Drop Leaf joints (Fig. 2) before the edges of the table are shaped, use the Drop-Leaf joint shaper cutters, Drop Leaf Bead Cutter & Drop Leaf Cove Cutter, and slowly ease it into the stock - about 1/4" each pass. This two-knife set requires that one be raised from underneath and one be lowered onto the workpiece. Fig. 2 Cut in the Drop Leaf joints before the edges of the top are shaped. 4. The slot mortise-and-tenon joints will give real strength to your table and minimize the wobble found in less structurally sound joints. Used here as one of the locking joints, it helps from the rugged and sturdy framework. To prevent mixing the faces as you cut the joinery, carefully mark and identify the table leg (A) stock relative to their final positions. Mark locations for eight slot mortises and two dovetails (See Table Assembly) Turn the legs (A) on the lathe. Next, remove most of the stock from the mortises with the Slot Mortising Package. Then, use any combination you prefer of to square-up the mortises. (Always cut the slot mortises before the tenons, as it is easier to adjust a miscue in the mortise than tenon.) 5. Cut the dovetail slots in the top of the front legs (See Table Assembly). The locking dovetails anchor the entire front of the table assembly and lock the legs and front (H) firmly together. Mark the top of the legs with a sharp knife. For initial roughing out, use a 1/2" brad point bit with the Mark V set in the horizontal-boring mode. Finish with a 1/2" chisel. Use a Bandsaw to cut the male dovetail on the front top rail (C). Finish fit with a chisel and wood rasp. Next, use the Dado set and an extension fence (Fig. 3) to cut the eight tenons and custom-fit your slot mortises. Use a sharp knife to mark tenons (this prevents splinters as you make Dado cuts). To leave room for glue to expand, cut tenons 1/8" less in length than the depth of the corresponding mortises. Fig. 3 Using Dado to cut tenons (note use of extension fence). 6. To make dowel joints on the Drop Leaf supports (F), use a Dado blade with the miter gauge set at 45į to cut the opening in the sides (Fig. 4). A 45į miter on each end makes these supports self-aligning, flush to the side when closed. Next, cut the supports and drill for the dowel pins. Rub a little soap on the dowels and insert them in the supports and sides. Fig. 4 Cutting the opening for Drop Leaf supports - 1/2 of the depth at a time. If you'd like to add a decorative touch around the base of the apron (B & E), use a Bead & 1/4 Round molding cutter positioned half-way onto the surface of the bottom edge of the stock. For safety, use a push stick or push block. Next, drill 3/8" screw pockets (Fig. 5) in sides (B) and back (E) to hold the top in place. (The table base and top form a simple butt joint and need this reinforcement.) Dry assemble the legs (A) to the apron pieces (B, C, D & E) to check the fit and apply masking tape at each joint. Disassemble and carefully apply glue to each slot mortise-and-tenon and dovetail. Reassemble, check squareness, and clamp together for 24 hours. The tape keeps excess glue from seeping onto the face of the wood. Fig. 5 Drilling screw pockets in sides. Drilled at 10į with a 1/2" brad point bit, to within 3/8" of the bottom. Use a 1/4" brad-point bit to make pilot hole for the #12 roundhead screws. 7. To withstand the pressure exerted on the drawer case, we used a combination Dado/spline joint to lock the front of the drawer front (H), (See Detail B). Turn the drawer front on edge and use a Dado blade to cut the 5/16" x 3/4" deep Dado, then use a regular blade to cut the 3/16" x 1/4" deep spline. Next, cut the 1/2" stop Dado for the drawer end with either a Dado blade or Router Package (Fig. 6). The strength of these joints eliminates the need for glue-blocks. Fig. 6 Routing 1/4" groove for drawer bottom. 8. To cut the self-aligning sliding dovetails in drawer sides (J), use the Mark V in the drill press mode with a dovetail router bit (Fig. 7). Next, with the Mark V still in the drill press mode, rout the drawer guides (G), (Fig. 8). Fig. 7 Routing dovetail slot for drawer guide. Two passes are needed; both at full 1/4" depth. Fig. 8 Routing dovetail drawer guides with feather board firmly holding stock against fence. Push against router rotation. Drill and countersink holes for attaching the guides to the inside of the aprons on the sides' (B). Assemble and glue the drawer (but not the bottom [L], as final fitting may be necessary). Mark for the drawer guides (G) and drill pilot holes - but donít attach them yet. The position of the Drop Leaf hinges is critical (See Detail A). From the shoulder of the joint, move the hinges 1/16" toward the leaf. This prevents binding as the leaf moves. As you make the shallow mortise to accept the hinge, form a relief cut for the hinge's cylinder or pivot. 9. To withstand the pressure exerted on the drawer case, we used a combination Dado/spline joint to lock the front of the drawer front (H), (See Detail B). Turn the drawer front on edge and use a Dado blade to cut the 5/16" x 3/4" deep Dado, then use a regular blade to cut the 3/16" x 1/4" deep spline. Next, cut the 1/2" stop Dado for the drawer end with either a Dado blade or Router Package (Fig. 6). The strength of these joints eliminates the need for glue-blocks. Next, fit the top into place - no glue, screws will hold it and permit expansion/contraction. Once the top is secured, mount the drawer guides - no glue. Rub with soap for smoothness. Finally, remove the Drop Leaf hinges. Finish sand and apply stain and finish. Now that youíre finished, give yourself a hearty pat on the back and show your new custom-crafted, Drop Leaf table to someone you care about. Congratulations! Now is when the satisfaction and reward really begin. NOTE: For clarity, guards not shown in illustrations. Hardware Hinges - the Drop Leaf hinge increases the beauty of the piece by eliminating the unsightly gap formed by butt hinges. Plus it adds a touch of professionalism. When installing the hinge, fasten the small side to the Drop Leaf and the large side to the table underside. Be sure to specify 1-1/4" when buying your hinges. Details, Drawings & Layouts mentioned in this article can be found Here
LIST OF MATERIALS Hardwood:
|
|||||||||||||||||||||||||||||||||||||||||||||||||||||||


